
Your lounge suite looks tired, stains are spreading, and you’re worried about dust mites lurking in the fabric. Whether you manage rental properties across Lilydale or maintain your family home in Healesville, keeping upholstery clean affects both appearance and indoor air quality. Professional cleaners follow a structured 8-step workflow that restores furniture safely and effectively. This guide walks you through each stage, from fabric inspection to protective finishing, so you understand what quality upholstery cleaning involves and how to maintain results between professional services.
Table of Contents
- Key takeaways
- Preparing for upholstery cleaning: inspection and tools
- Executing the cleaning workflow: stain treatment to deep clean
- Finishing steps: drying, inspection, and fabric protection
- Common mistakes and maintenance tips for longer furniture life
- Professional upholstery cleaning services in Yarra Valley
- Frequently asked questions
Key Takeaways
| Point | Details |
|---|---|
| Fabric care codes | Always check the fabric care code on the furniture tag and use the recommended method to prevent shrinkage, colour bleed or damage. |
| HEPA vacuuming and extraction | Begin with a thorough HEPA vacuum to lift surface dirt and then use hot water extraction on suitable fabrics to remove dust mites, pollen and bacteria. |
| Stain pre treatment | Pre treat stains from the outside in, choosing enzyme based, tannin or solvent cleaners as appropriate and never scrub. |
| Regular maintenance schedule | Maintain fabrics with weekly vacuuming and schedule professional cleans every 12 to 18 months to maximise life and hygiene. |
Preparing for upholstery cleaning: inspection and tools
Before touching your furniture with any cleaning solution, you need to identify what you’re working with. Professional upholstery cleaning starts with fabric inspection and care code verification. Every piece of furniture has a tag showing W for water-based cleaning, S for solvent-only, WS for either method, or X for vacuum-only. Ignoring these codes leads to permanent damage, shrinkage, or colour bleeding.
Walk around each piece and map existing stains, worn areas, and structural issues. Note the fabric type because silk, velvet, and antique materials require gentler approaches than synthetic blends. Check cushions, armrests, and high-contact zones where body oils accumulate. This inspection tells you which tools and products you’ll need and whether certain areas need special attention.
Gather your equipment before starting. You’ll need a HEPA-filter vacuum to remove surface soil without redistributing allergens, cleaning agents matched to your fabric codes, targeted stain removers for protein, tannin, or oil-based marks, and an extraction machine for deep cleaning. For delicate fabrics, have solvent-based cleaners ready and avoid water altogether. Temperature matters too: hot water suits synthetic fibres but damages natural materials.
| Fabric code | Cleaning method | Temperature limit | Common fabrics |
|---|---|---|---|
| W | Water-based | Up to 70°C | Cotton, linen, polyester |
| S | Solvent-only | Room temperature | Silk, velvet, rayon |
| WS | Water or solvent | Up to 60°C | Mixed blends, microfibre |
| X | Vacuum only | N/A | Delicate antiques, fragile weaves |
Test every cleaning product on a hidden spot first, like the back panel or under a cushion. Wait 10 minutes and check for colour transfer, fabric puckering, or texture changes. This simple step prevents common upholstery cleaning mistakes that ruin entire pieces. Even professional-grade products can react unpredictably with certain dyes or finishes.
Pro Tip: Keep a furniture care journal noting fabric codes, previous cleaning dates, and product reactions. This record helps you track maintenance intervals and avoid repeating mistakes across multiple pieces.
Executing the cleaning workflow: stain treatment to deep clean
With preparation complete, you’re ready to execute the active cleaning sequence. Start with thorough HEPA vacuuming to remove loose dirt, pet hair, and surface debris. Use the upholstery attachment and work in overlapping strokes, paying extra attention to crevices where crumbs and dust collect. This step prevents dirt from turning into mud when you introduce moisture.
Pre-treat stains next, working from the outside edge toward the centre to avoid spreading. Protein stains like blood or food need enzyme-based treatments, tannins like coffee or wine respond to acidic solutions, and oil-based marks require solvent degreasers. Apply the appropriate product, let it dwell for the recommended time, then blot gently with a clean white cloth. Never scrub, as this damages fibres and pushes stains deeper.
Now comes the deep clean. For W and WS fabrics, hot water extraction injects heated detergent solution deep into fibres and immediately extracts it along with embedded dirt and allergens. This method removes up to 97% of dust mites, pollen, and bacteria, making it ideal for families with allergies or asthma. The heated water loosens soil bonds while the powerful suction pulls everything out, leaving minimal moisture behind.
- Vacuum all surfaces with HEPA attachment in overlapping strokes
- Pre-treat identified stains with appropriate products and dwell time
- Fill extraction machine with heated cleaning solution matched to fabric code
- Work in small sections, injecting solution and extracting immediately
- Overlap passes by 50% to ensure complete coverage without over-wetting
- Rinse with clean water extraction to remove all detergent residue
For S-code fabrics like silk or velvet, switch to low-moisture solvent cleaning. These methods use specialised dry compounds or minimal liquid solvents that clean without water exposure. The process takes longer but protects delicate fibres from water damage, shrinkage, or colour bleeding. Antique furniture often requires this approach regardless of original fabric type.
Rinsing is crucial but often skipped in DIY attempts. Detergent residue attracts dirt rapidly, making furniture look dirty again within weeks. Run clean water through the extraction machine and make several passes over each section until the extracted water runs clear. This step takes patience but dramatically extends the time between cleanings.
Pro Tip: Never overlap cleaning passes more than necessary. Multiple extractions in the same spot push moisture deeper into padding and frames, creating perfect conditions for mould growth and structural damage.
Finishing steps: drying, inspection, and fabric protection
Proper drying prevents the most common post-cleaning problems. Open windows, run fans, and use dehumidifiers to accelerate air circulation around cleaned furniture. Most pieces need 6-12 hours to dry completely, though thick cushions or humid conditions extend this time. Touch the fabric and feel underneath cushions to confirm everything is bone-dry before use. Sitting on damp upholstery compresses fibres and creates permanent watermarks.
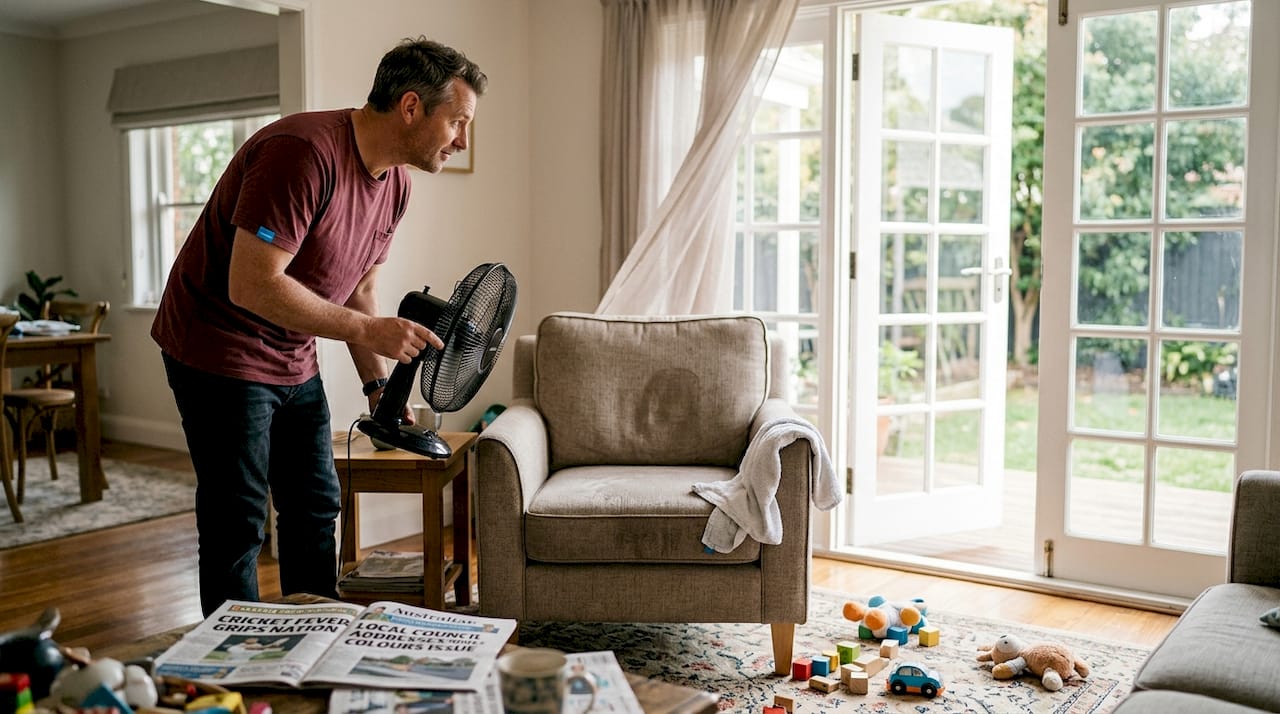
Inspect your work once the fabric is dry. Check for missed spots, lingering stains, or areas where cleaning created new problems. Good lighting helps reveal issues you missed during the wet phase. If you find problems, address them now before they set or become more difficult to remove. Sometimes a second targeted treatment works better than trying to fix everything in one aggressive session.
Fabric protection treatments create an invisible barrier that repels liquids and resists soil attachment. These products work like waterproofing for outdoor gear, causing spills to bead up rather than soak in. Application extends fabric life and makes future cleaning easier because dirt sits on the surface instead of bonding with fibres. Reapply protection after every professional clean for consistent results.
- Position fans to create cross-ventilation without blowing directly on wet fabric
- Elevate cushions on racks or clean surfaces to expose all sides to air
- Use moisture metres to verify complete drying in thick padding and frames
- Apply fabric protector in light, even coats following manufacturer instructions
- Keep furniture out of use until 100% dry to prevent compression marks
Timing matters for protection application. The fabric must be completely dry but not yet exposed to new soil or body oils. Most protectors need 2-4 hours to cure before furniture returns to service. During this window, keep pets and children away to avoid tracking dirt onto treated surfaces. Once cured, the protection lasts 12-18 months under normal use.
Document your work with photos and notes. Record the cleaning date, products used, drying time, and any issues encountered. This information helps you refine your process and provides valuable history when you need professional upholstery maintenance services. Professionals appreciate knowing what products were previously used and how furniture responded.
Common mistakes and maintenance tips for longer furniture life
Over-wetting ranks as the single biggest mistake in upholstery cleaning, causing more damage than any other error. Excessive moisture seeps into padding and frames, creating ideal conditions for mould, mildew, and wood rot. Water rings appear as tidelines when furniture dries unevenly, and these marks often become permanent. Professional equipment extracts 95% of applied moisture, but DIY rental machines typically manage only 60-70%, leaving too much water behind.
Over-wetting causes 73% of upholstery damage from DIY cleaning attempts. The moisture penetrates padding and frames, leading to mould growth, structural damage, and permanent watermarks that professional cleaning cannot remove.
Scrubbing stains aggressively destroys fabric structure. The friction breaks individual fibres, creates fuzzy patches, and spreads stains wider. Always blot from the outside edge inward using a clean white cloth. Replace the cloth frequently as it absorbs the stain to avoid redepositing soil. Patience wins here: multiple gentle blotting sessions remove stains that aggressive scrubbing only makes worse.
Ignoring fabric codes leads to predictable disasters. Water-based cleaning on S-code fabrics causes shrinkage, colour bleeding, and texture changes. Using solvents on W-code materials can damage backing or create chemical reactions with previous treatments. The care tag exists for a reason, so check it before every cleaning session, even on familiar furniture.
Weekly HEPA vacuuming extends furniture life by removing abrasive soil particles that act like sandpaper on fibres. This simple habit reduces wear by 60% and removes allergens before they embed deeply. Use the upholstery attachment and work systematically across all surfaces, including backs and sides where dust accumulates invisibly.
- Vacuum weekly with HEPA filtration to remove surface soil and allergens
- Blot spills immediately with white cloths, working from edges inward
- Rotate cushions monthly to distribute wear evenly across all surfaces
- Keep furniture away from direct sunlight to prevent fading and fibre degradation
- Schedule professional cleaning every 12-18 months for typical households
- Increase frequency to 6-12 months with pets, children, or high traffic
- Address stains within 24 hours before they set permanently into fibres
- Use manufacturer-approved spot cleaners matched to your fabric code
Professional cleaning intervals depend on household factors. Standard homes need service every 12-18 months to remove deep soil and refresh protection treatments. Homes with pets, children, or high traffic benefit from 6-12 month intervals. Property managers should clean between tenancies and annually during occupancy. Regular professional attention combined with proper home maintenance keeps furniture looking new and extends its usable life significantly.
Document your maintenance routine and avoid repeating cleaning mistakes that damage furniture. Note which products work well, how long drying takes in your climate, and any fabric reactions you observe. This knowledge helps you make better decisions and communicate effectively with professional cleaners when you need their services. Understanding proper cleaning frequency for your specific situation prevents both neglect and over-cleaning.
Professional upholstery cleaning services in Yarra Valley
Understanding the upholstery cleaning workflow helps you maintain furniture between professional services and recognise quality work when you hire experts. Professional cleaners bring commercial-grade equipment, specialised training, and experience handling diverse fabric types safely. They complete in hours what takes DIY attempts days, with better results and lower risk of damage.
Local upholstery cleaning services across the Yarra Valley offer tailored solutions for homeowners and property managers throughout Lilydale, Mooroolbark, Chirnside Park, and surrounding areas. These teams understand regional challenges like dust from rural properties, pet hair from active households, and the quick turnaround needs of rental management. Combining professional deep cleaning with your home maintenance routine keeps furniture fresh, hygienic, and looking its best for years.
Explore detailed information about upholstery cleaning methods and establish scheduled maintenance intervals that match your household needs and budget.
Frequently asked questions
How often should upholstery be professionally cleaned?
Standard interval is 12 to 18 months for average homes with normal use. Increase frequency to 6-12 months if you have pets, children, or high traffic areas. Property managers should clean between tenancies and annually during occupancy. Regular professional service removes deep soil that vacuuming cannot reach and refreshes fabric protection treatments.
What cleaning methods are best for delicate fabrics like silk or velvet?
Silk and velvet require solvent-only cleaning methods that avoid water exposure entirely. Hot water extraction damages these fabrics through shrinkage, colour bleeding, and texture changes. Professional cleaners use specialised dry compounds or minimal-moisture solvents that clean effectively without water. Always verify the S fabric code before cleaning delicate materials.
How can I maintain upholstery between professional cleans?
Weekly HEPA vacuuming and prompt spot blotting extend furniture life by 60% by removing abrasive soil before it embeds. Rotate cushions monthly to distribute wear evenly. Blot spills immediately with white cloths, working from edges inward without scrubbing. Keep furniture away from direct sunlight and address stains within 24 hours using products matched to your fabric code.
Can I use carpet cleaning machines on upholstery?
Carpet machines work on durable upholstery fabrics but require careful technique. Use upholstery attachments designed for furniture, not floor tools. Reduce water flow and suction settings to prevent over-wetting. Make quick passes with maximum extraction to minimise moisture. Never use carpet machines on delicate fabrics, antiques, or anything with an S or X care code. Professional upholstery equipment offers better control and safer results.
Recommended
- Master the Commercial Carpet Cleaning Workflow for Pristine Results – Yarra Valley Carpet Cleaning
- How Upholstery Cleaning Works: Complete Guide – Yarra Valley Carpet Cleaning
- 7 Essential Steps for a Thorough Upholstery Cleaning Checklist – Yarra Valley Carpet Cleaning
- Upholstery Cleaning Instructions for Spotless Results – Yarra Valley Carpet Cleaning